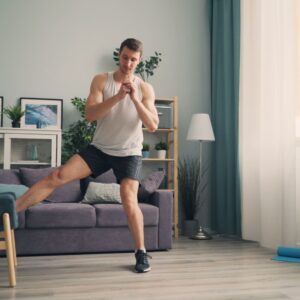

You do not have to get onto the floor to practise keeping your trunk steady while your arms and legs move. Standing core exercises can give you a way to work on that control, particularly if you prefer an upright session. The useful question is what each movement asks you to manage, rather than how intensely you can twist or how much your abdomen burns.
The four movements below are an illustrative beginner sequence for adults who can stand comfortably. They are not a treatment for back pain, a validated rehabilitation programme or a promise of a smaller waist. Planks and crunches are simply absent from this session; that does not make them inherently harmful or unnecessary for everyone.
What standing work asks your trunk to do
Try lifting one foot while keeping your chest and pelvis facing ahead. Your stance changes even though you have not deliberately bent or twisted your torso. This is the theme of the session: make a modest limb movement while controlling the rest of the body.
Standing position alone does not tell you how difficult a core exercise is. A 2023 study of standing bird-dog variations measured muscle activity and balance in 20 adults recruited from fitness centres. Those demanding single-leg positions challenged balance and involved hip and lower-back muscles. The study did not test the four beginner drills here or establish their long-term results, and muscle activity measured in one session is not a guarantee of later strength gains.
That distinction matters when an easy standing routine is advertised as a replacement for every kind of core training. Unloaded movements can provide practice, but they may become too easy to provide much resistance. More challenging floor or resistance exercises can offer different demands when they suit your goals and abilities.
Set up support before changing your stance
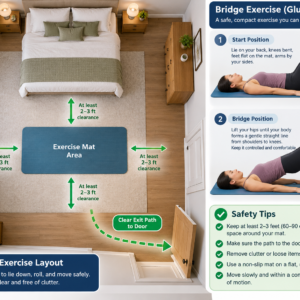
Use a dry, secure floor and comfortable footwear. Clear space in front for a modest knee lift and behind for a short toe reach. Keep a genuinely fixed countertop beside you for light hand support. Avoid mobile chairs, folding tables and furniture that tips when pressed.
Begin with feet about hip-width apart, knees relaxed and your gaze ahead. Let your ribs sit comfortably above your pelvis. Take a few ordinary breaths. You are aiming for a steady position you can breathe in, not a maximal abdominal squeeze.
The NHS balance exercise guide demonstrates controlled standing tasks and support near a wall. Use that general principle here: keep a reliable support available and reduce the challenge when steadiness is lost. If standing itself is painful or unreliable, this is not the format to force.
Practise these standing core exercises without rushing
| Movement | Purpose in this example | Setup and cue | Easier option | Small next step |
|---|---|---|---|---|
| Supported knee lift | Keep torso steady as one foot leaves the floor | Light hand support; lift one knee a modest amount without leaning back | Lift the heel while toes stay down | Pause briefly before replacing the foot |
| Forward arm reach | Keep ribs and pelvis steady while arms move | Both feet planted; reach one arm forward below shoulder height | Shorter reach or lower arm | Slightly longer comfortable reach |
| Rear toe reach | Control a small change in stance | Slide one foot back with toes on the floor; keep hips facing ahead | Shorten the toe reach | Pause one second before returning |
| Supported split-stance hold | Maintain a staggered position while breathing | One foot slightly ahead, both feet grounded; light support | Bring feet closer together | Add two comfortable seconds |
These are original practice drills and progressions. Their modest ranges are intentional. You do not need an overhead reach, a deep lunge, a loaded twist or an unsupported one-leg hold to start.
Practise each move without rushing
Supported knee lift: stand beside the fixed counter and touch it lightly. Slowly lift the outside knee to a comfortable height, pause for a moment, then replace the foot gently. Keep your torso facing forward. Do five repetitions, then turn carefully so the other hand can use support and repeat on the other side. If you lean, hike the hip or grip hard, reduce the lift or keep toes down.
Forward arm reach: stand with both feet planted. Reach one arm forward as if pointing to something nearby, then lower it. Alternate for five reaches per side. Keep the arm below shoulder height and stop before the ribs flare or your body leans back. Make the reach shorter to simplify it. If arm motion is uncomfortable, omit this drill rather than forcing range to make it look like exercise.
Rear toe reach: begin beside support with weight distributed comfortably. Slide one foot a short distance behind you, keeping its toes on the floor. Return it without swaying or arching your back. Try five per side, changing your orientation to the counter as needed. This is a toe-down stance drill, not the full standing bird dog studied above. Keep the distance small enough to remain in the cleared space.
Supported split-stance hold: set one foot slightly ahead of the other while preserving some sideways width. Both feet stay grounded. Hold for ten seconds with normal breathing, return to your usual stance, then change the forward foot. Avoid a tightrope stance. If steadiness requires pulling on the counter, bring the feet closer and shorten the hold.
The moment control disappears, the repetition or hold has finished. That decision is more useful than staying in position until the timer ends.
An eight-minute example
This clock allocates practice and recovery rather than requiring constant movement. The schedule is an editorial example; no study has validated its dose.
| Time | What to do |
|---|---|
| 0:00–2:00 | Easy low march, then settle into a comfortable standing stance |
| 2:00–3:00 | Knee lifts: up to 40 seconds for controlled practice, 20 seconds rest |
| 3:00–4:00 | Arm reaches: up to 40 seconds practice, 20 seconds rest |
| 4:00–5:00 | Rear toe reaches: up to 40 seconds practice, 20 seconds rest |
| 5:00–6:00 | Split stance: 10 seconds each side with an unhurried stance change; rest for the remainder |
| 6:00–8:00 | Easy low march, slowing gradually |
Two opening minutes, four one-minute blocks and two closing minutes total eight minutes. The repetition targets above are optional ceilings inside the work allocations; do fewer and rest if needed. Take extra time for turning or changing stance. Keep the effort easy enough that normal breathing remains comfortable.
Stop a drill for pain, new tingling or loss of balance. Stop the session for dizziness, chest pain or unusual breathlessness and seek appropriate help. AHA exercise safety guidance identifies heart-related symptoms as reasons to stop and obtain medical evaluation.
Progress the thing you can observe
Repeat the same version before adding difficulty. Write down support used, lift or reach range, comfortable repetitions and whether you could breathe throughout. A knee lift held steady for a moment is a clearer improvement to track than an unspecified “core burn.”
Change one variable: a slightly longer pause, one additional controlled repetition or a small range increase. Keep support if you need it. Removing support is not compulsory, and closing your eyes or standing on soft cushions is not part of this progression.
If all four drills become easy, consider a broader strength plan instead of endlessly extending holds. Sportiemade’s floor-core article describes floor-based options if you want to explore another position. Exercise selection still depends on your own comfort and goals; no single movement is the best choice for every reader.
Frequently asked questions
Can standing exercises train my core?
They can involve trunk muscles and provide a way to practise steadiness during limb movement. The training effect depends on the movement and challenge. This short unloaded example does not promise the same adaptation as a harder resistance programme.
Do standing core moves reduce belly fat?
This sequence does not target fat loss from the abdomen; ACE identifies spot reduction as a fitness myth. Its purpose is movement control. Do not judge the session by waist measurements or expect a local body-composition change from exercising one area.
How do I make the movements easier?
Use reliable light support, smaller reaches and fewer repetitions. Keep toes grounded during the knee-lift alternative and use a wider, less staggered stance. Stop rather than practise through pain or unsteadiness.
Choose one drill that feels clear and controlled, then build from it. Standing core practice is most useful when you know what stays steady, what moves and when to finish the repetition.
Sources
Standing-control context: NHS balance exercises and the standing bird-dog laboratory study. Neither validates this original eight-minute sequence.

Nick Smoot is a certified fitness coach and the founder of Smoot Fitness, established in 2012. With over a decade of hands-on experience, Nick has personally coached more than 400 clients both in person and online helping them achieve lasting, life-changing physical transformations.
As a contributing expert at Sportiemade (sportiemade.com), Nick brings real-world expertise and a no-nonsense approach to fitness. His coaching philosophy goes beyond short-term results: he equips every client with the knowledge, habits, and mindset needed to get into the best shape of their life and stay there permanently.
Nick specialises in strength training, endurance performance, and the mental discipline that ties them together. His signature philosophy? Lift heavy, run far, and never stop learning.
Whether you are just beginning your fitness journey or looking to break through a plateau, Nick's evidence-based methods and proven track record make him one of the most trusted voices in the fitness space.